
How to Connect Your Shopify Store to ARIQ
This guide explains the exact process to generate your Shopify Admin API Access Token and connect your store vertex-kits inside the ARIQ Dashboard.
Shopify Develop Apps
ARIQ Agency Dashboard
Orders, Products, Customers
In ARIQ Dashboard
Video Walkthrough: Full Setup Process
Watch the step-by-step demonstration of connecting Shopify to ARIQ.
Who connects Shopify
The connection is saved on one project. An agency connects each client from that client's project. A business connecting its own account uses its own project. Both follow the same Connect button.
Sign in to ARIQ with your agency user. Open the client project, then connect that client's Shopify account. The client does not need an ARIQ login. Use the Shopify login that can already see that client's data.
Sign in to ARIQ, open your project, and connect the Shopify account this business already uses. You approve access with that same account.
Connect it inside ARIQ
- 1Sign in to ARIQ.
- 2Open the project this account belongs to. Switch projects from the left sidebar if you manage more than one client.
- 3Open Shopify from the workspace tabs, or go straight to the Shopify page.
- 4Click Connect, then Sign in with Shopify. ARIQ sends you to Shopify. Sign in with the account that can see this client's data and allow access. You do not paste a password into ARIQ.
- 5Stay on that project and sync. The page shows live numbers only after this account is connected. Another client's project stays empty until you connect it there too.
Step-by-Step Instructions
Open Shopify Store Develop Apps Settings
Open Vertex Kits SettingsLog in to your Shopify store admin and navigate to Settings > Apps and sales channels > Develop apps. If you see an approval prompt, click "Allow custom app development".
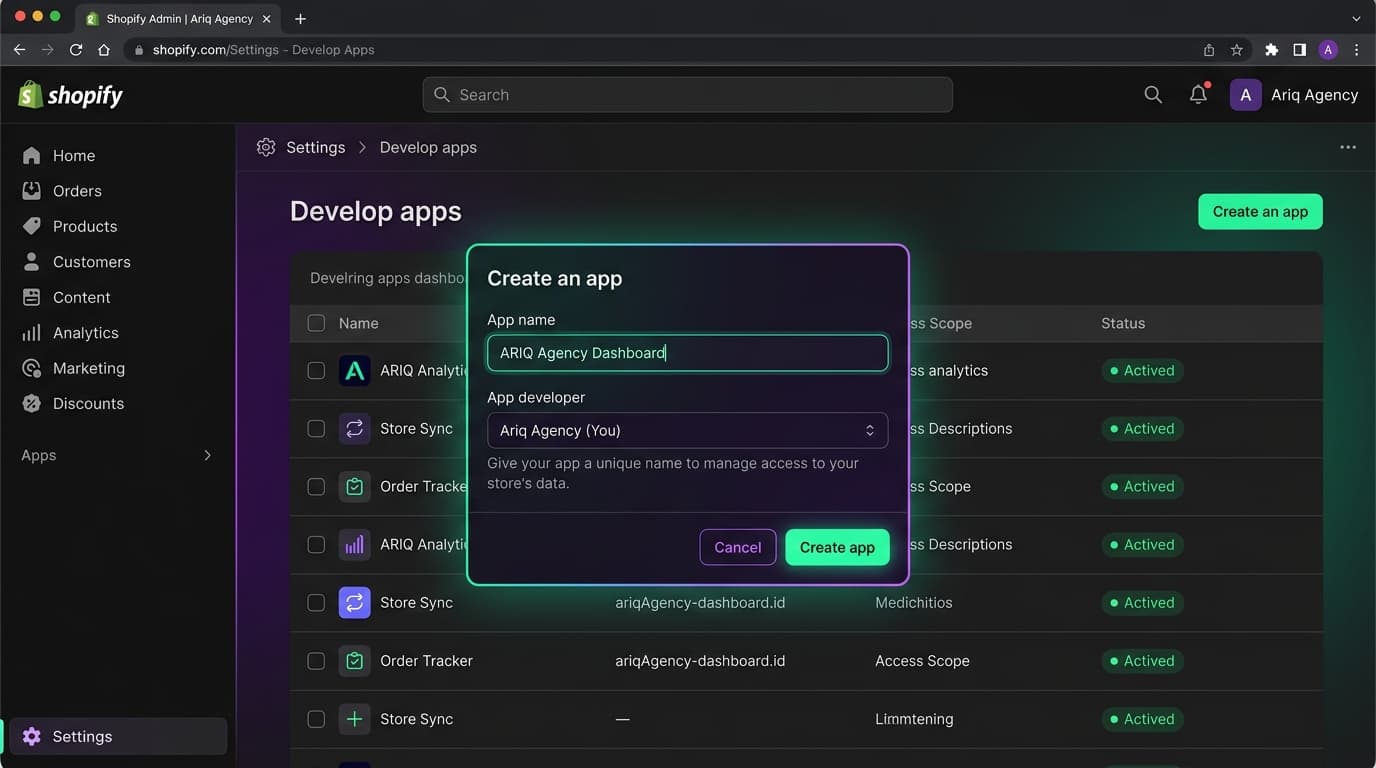
Click "Create an app" and Enter Name
Click the green "Create an app" button in the top right. Name the app ARIQ Agency Dashboard and choose your developer email.
Configure Admin API Scopes (Permissions)
Click "Configure Admin API scopes" and enable permissions for orders, products, and customers. Once checked, click "Save" in the top right.
Read orders and sales
Order notes and fulfillment tracking
Full catalog and variants
Catalog inventory sync
Customer profiles and metrics
Customer updates
Coupon rules and campaigns
Create discount promotions
Promotional pricing rules
Price rule configuration
Real-time stock monitoring
Draft quotes and unfinished orders
Install App & Reveal Admin API Access Token
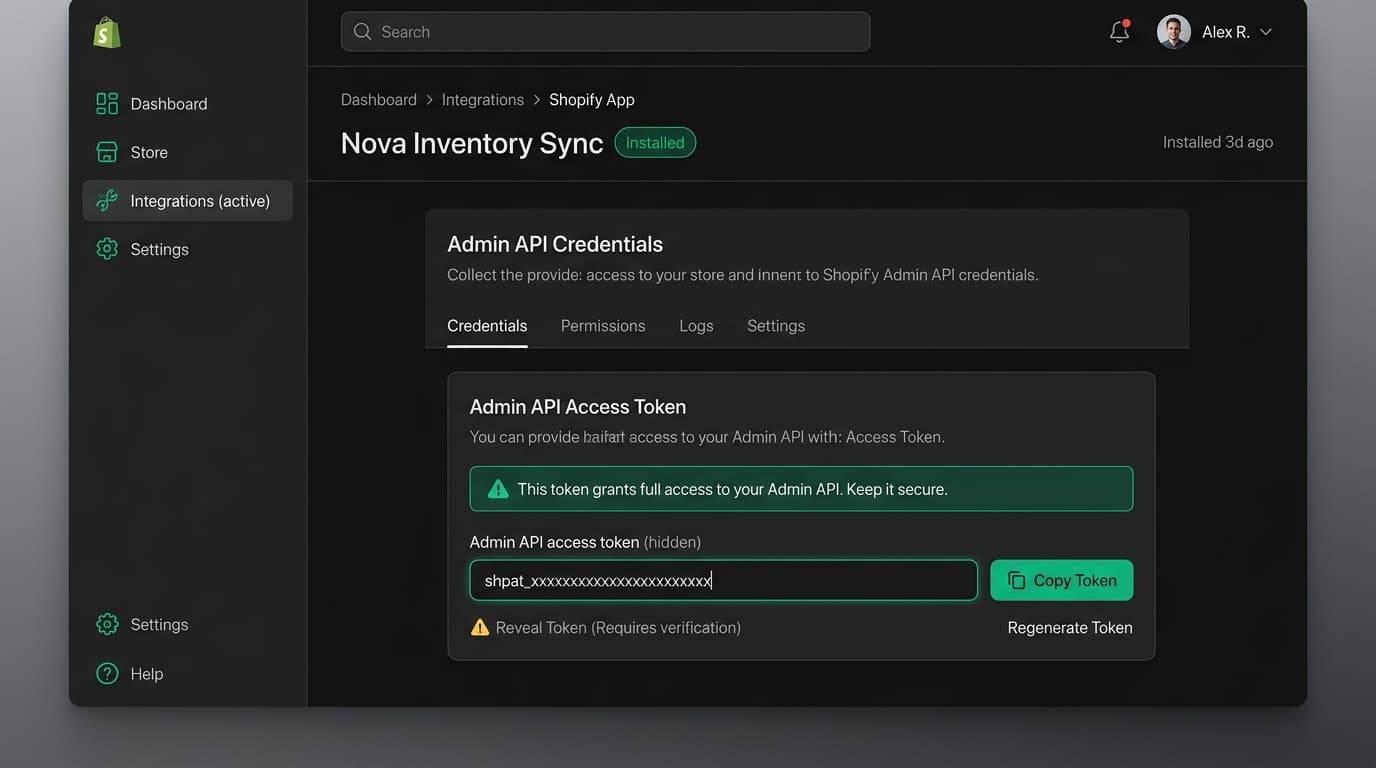
Click the "API credentials" tab and click the green "Install app" button. After installation, click "Reveal token once" to view and copy your token.
Shopify reveals this token only once. Token format: shpat_xxxxxxxxxxxxxxxxxxxxxxxxxxxx. Copy it immediately to complete Step 5.
In the Shopify Dev Dashboard, the Allowed Redirection URL was set to https://example.com. You do not need to use that OAuth flow. Generating a direct Admin API Token using Steps 1 through 4 above is the fastest and recommended way to connect your store.